A step-by-step guide for building and maintaining an outdoor rink for endless, old-fashioned Canadian backyard fun
WE’D BEEN HEMMING AND HAWING for weeks. “Winters aren’t what they used to be,” one of us shrugged. We shook our heads glumly. “Seems like a lot of work for one month’s enjoyment,” someone else mumbled. We nodded our heads glumly. Then someone (probably me) muttered something old and tired about the greenhouse effect, and we suddenly realized we were making excuses when we could be making hay.
That was last November. On a cool Saturday afternoon in the April that followed, after a near perfect winter for making and maintaining ice, we disassembled our first neighbourhood rink feeling pretty darn good about the winter we’d given our kids and, truth be told, ourselves.
Was it hard work? Absolutely. Was it time-consuming? You bet. Was it worth it? As of this writing, plans for year two are well underway. Enough said. What follows is a simple plan for building a low-cost backyard skating rink. When approached in a do-it-yourself spirit of improvisation, it will result in a rink every bit as successful as ours.
To the neighbourhood skating rink crew: Ben, Bernie, Dave, Duane, Mark, Mike, Ron and Will. Thanks guys, and here’s to another frigid winter.
STEP 1: CHOOSING A LOCATION
Before buying materials, you’ll want to make sure your backyard is suitable for a rink. The most important requirement is a relatively even surface without much slope. Small bumps and undulations won’t present much of a problem, but significant sloping will cause most of the water to flow downhill, resulting in thin ice at the high end of your rink, and too much pressure on the boards at the low end. Try to find an area with no more than a 6-to-9 inch difference between its highest and lowest point.
Although far less important than slope, choose an area that is shady during the day if possible. Winter sun can soften ice even when the temperature is below zero.
Once you’ve chosen your location, mark off your rink area and measure its dimensions.
STEP 2: GATHERING MATERIALS
To build your rink, you’ll need:
- 2 x 6-inch (or 2 x 8-inch) lumber for the frame – the amount depends on the size of the rink you’re planning. Remember to include the lumber needed to join the pieces of the frame (see Step 3)
- Wooden stakes – again, the number depends on rink size
- Screws or nails to connect the frame
- A drill, hammer and saw
- A thick clear plastic liner
- Large staples and a staple gun to attach the liner to the frame
It’s important to use boards no higher than 6 to 8 inches for your rink frame. As tempting as it may be to build a hockey-style rink with 4-foot-high boards, the idea won’t seem as great when you have to shovel a foot of snow over a four foot barrier to clear Maple Leaf Gardens for action. The boards should be easy for all users to step over.
Because it can be somewhat expensive, you might also be tempted to do without a plastic liner. Resist this temptation and cough up the cash. A liner prevents the garden from flooding, retains water during warm spells, and generally results in smoother, higher quality ice. And if you’re concerned a liner will damage your lawn, don’t be. Ours looked better than ever the following spring.
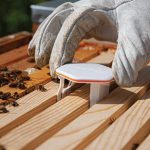
STEP 3: BUILDING THE FRAME
Now that you’ve chosen the perfect location and have the materials you need, it’s time to build the frame.
- Cut a number of foot-long sections of lumber to use as joiners.
- Join the boards by butting them against each other and attaching them with screws or nails and a joiner.
- Once the frame is complete, drive a stake into the ground at every second or third joiner. Then attach each stake to its joiner to keep the frame from shifting.
STEP 4: ATTACHING THE LINER
Wait until just before your first flood to attach the plastic liner to the frame. This keeps animals and anxious kids from damaging the plastic.
Keep an eye on the forecast, and when you see several consecutive days of well-below-freezing temperatures approaching, attach the liner as follows:
- Clear the area inside the frame of sticks and stones that could puncture the liner. (Leaving your grass a little long in the fall can provide a natural liner cushion.)
- Spread the liner out flat on the ground within the frame, folding it up and over the sides, ensuring all sides have several inches of excess plastic.
- Staple it in place one side at a time, allowing enough give so the entire liner lies flat with the ground when you’ve finished. If the liner is stretched too tightly, the weight of the water could tear it or rip out the staples when you flood.
STEP 5: THE FIRST FLOOD
Let temperature, not snow cover, determine when to flood. In fact, when you use a liner, snow is not necessary at all. Once the temperature is well below freezing (around –10°C or colder) and will be for some time, run your garden hose over the liner until it is covered in three or four inches of water at its highest point.
Before anyone uses the ice, it needs to be frozen solid, which usually takes several days. When checking the ice, wear shoes, not skates, to prevent damaging the liner.
ONGOING MAINTENANCE
As the rink is used, “snow” builds up and will need to be cleared. However, each time you remove this wear-and-tear snow, you’re shovelling away a portion of your ice pad, so occasional re-flooding is required to maintain the pad’s thickness.
The best time to flood is late in the evening, generally the coldest part of the day. Scrape the ice clear with a shovel, then cover the entire pad with a fresh layer of water. Try not to spray water onto an established pad directly from a garden hose. Even when the hose is kept moving, the force of the water tends to bore holes in even the hardest ice. While a variety of commercial “rink rakes” have been developed to solve this problem, one of our crew constructed his own version by punching holes in a piece of PVC pipe. For minor touch-ups, this worked well.
For a major resurfacing, we filled several garbage bins and positioned them at various parts of the rink. We then tipped them one at a time, moving from one end of the rink to the other until the entire surface was covered. We also found that hot water works better than cold for re-flooding because it seems to freeze more smoothly.
You’ll find that ice maintenance is more art than science, and you’ll develop techniques that work best for your rink. Here are a few extra maintenance tips. l To repair holes and cracks, pack them with snow before flooding.
- Keep leaves, sticks, pucks, nets, etc. off the ice when the rink is not in use. Just as the sun will melt ice near a darkly painted frame, it will melt objects and debris into the ice, leaving assorted holes and cracks. Last year, a leaf fell onto our rink in the morning and by mid-afternoon it had melted more than an inch into the ice.
- Don’t be in too big a hurry to shovel after a snowfall, a good snowfall acts as an insulation blanket keeping the ice cold and hard
Story by:
David Bojarzin